Thursday, August 22, 2013

Velata Toffee Recipe

**2016 Update** This recipe is one I used with Velata chocolate, which is no longer available.  But I still love and enjoy this recipe using regular chocolate chips!  I changed the recipe shown here from the original Velata chocolate chips to one bag of regular chocolate chips.  :)

Well, I ran across this Toffee recipe that has been floating around the internet.  I wish I had the exact recipe I followed so I could link this brilliant person like they deserved to be linked.  But if you do a simple google search for "saltine cracker toffee", you're bound to find a slew of copy cat recipes!  That's what my recipe is...it's a copy cat, except I used my beloved VELATA chocolate instead of regular store bought chocolate chips.  The difference?  Think of Velata as the Macy's or Bloomingdale's of department stores, while store bought chocolate chips is the Dillard's or JCPenney's.  Nothing wrong with store bought chocolate chips at all...they are still tasty...but not AS tasty or AS gourmet as Velata!

So here it is, complete with my own personal pictures of the recipe steps.  :) 

What you need:
36 saltine crackers
1 cup butter

1 cup brown sugar
 1 bag Chocolate chips

1 cup of your choice of chopped walnuts, peanuts, sprinkles, crushed candy, etc... 


Directions:
Preheat oven to 375.
Line a cookie sheet with foil and spray with cooking spray. 
Place the saltines in a single layer on the tray. Try not to overlap.
I broke some of mine to fill in the gaps. ;)
And yes, I ended up putting some on that bottom left corner!


 In a saucepan, melt the one cup of butter.
Add your one cup of brown sugar.
Bring to a slow boil and stir continuously for about 3 minutes.


 Immediately pour the mixture over the crackers, covering as evenly as possible.


 In your heated oven (375 degrees), bake for 5-7 minutes.

After taking them out, immediately place your
Velata chips on the top. 
(I pretty much laid mine out one by one so they wouldn't overlap and take too long to melt.)
As you can see, I used white chocolate AND milk chocolate!
Allow the chocolate to melt a little on it's own.
Note: Velata chips are bigger than your normal chocolate chip. I placed mine back in the hot oven for 30 seconds to a minute to let them warm a tad!


Spread the melted chocolate from end to end.

Add your choice of toppings here: sprinkles, nuts, etc.  I decided not to use any on my first try.

Refrigerate until cool, then break into pieces to serve!


There you have it!  The easiest, yummiest "toffee" with chocolate ever!

:)

Sunday, June 30, 2013

Ready to Ship Jewelry

Hi all!  Some of you may know that I run a little jewelry boutique on Facebook and I also have an etsy account for my handmade items.  I'm running a special on my Ready to Ship items!  Check them out!  (You'll need to "like" my facebook page, the comment on the photo of the items you want.) 


$8.00 shipped- includes set of beaded earrings
 
 
 $5.00 shipped - includes set of cross earrings
 
 
 $8.00 shipped
 

$8.00 shipped
 
 
 $13.00 shipped - includes earrings
 
 
 $13.00 shipped - includes earrings
 
Check me out on Facebook!  Right now, I'm having a 30% off sale on these!  Get them now!
 

Wednesday, June 26, 2013

Scentsy "STAYcation"!

What's a "STAYCATION" Scentsy pack? 6 bars of scents that will take you away on your OWN little holiday!! They are buy 5 and get one free, so it's only $25!!

1) I'm feeling the need to "JET, SET and GO - whisk me off to a balmy, tropical paradise, of Brazilian orange, jungle papaya, and island vanilla".

2) Take me away to the "BEACH - with the scents of papaya, honeydew, and sweetened with a HINT of coconut"
3) Where I will sit beside that beautiful, blue "OCEAN - with cool and refreshing aquatic notes deepened with water lilies and ocean breezes"

4) In the cool of the trees in the "SERENE GREEN - where deep green lime leaves, crisp verbena, and tart citrus zest in a bright happy fragrance"

5)While I sip on this amazing "LIME & KIWI CANTALOUPE - a refreshing summer cooler with icy lime, juicy kiwi, and bright cantaloupe"

6) I know I need to return home at some point, but right now I am just simply enjoying this "HONEYMOON HIDEAWAY - where I have escaped to a secluded retreat of dew kissed lily, and tart sweet kiwi, shaded by a LUSH coconut palm!

Order your "STAYCATION" package from me today!!
 
 
www.allisonmckenzie.scentsy.us to order your "Staycation".
Note, this is just a fun way for me to recommend 6 of our scents from our new Spring/Summer 2013 scents and from our Favorites line.  There is not an actual "Staycation" Scentsy pack to purchase.  :)  Simply go to my website and find the 6 pack of bars for $25 (in Combine & Save section) and fill in your order with these scents, or ANY you choose to indulge in for your STAYCATION!


Braided Bracelets by Ann Faith Designs

Hi All!  :) I decided I'd share my Braided Bracelets I made for my Ann Faith Designs jewelry shop.  These are super popular and I feel that Facebook just isn't letting me show my work to enough people...they restrict posts SO MUCH on our fan pages now!  I'm not ready to add these to my etsy shop yet because I'm working on my Vintage jewelry lovelies!  I'll add them all at the same time. 

Anyway, here they are!  These were handmade with lots of love and care, and no, they aren't perfect...but that's the point of them being handmade.  They weren't made in a factory, where things are mass produced to look EXACTLY the same as the next bracelet out.  I love these color combos I did, which I haven't seen much of from others who do these too...so I'd like to think mine are unique in that way!  Super fun, funky colors for Summer! 


$12.00 Shipped to US only
 
If you are interested in these, you can check them out on my facebook page!
or follow me on Instagram
alli_McKenzie
 

Tuesday, June 25, 2013

How to Make Your Silver Look Antique! (With an EGG!)

Here in the south, we tend to like our silver polished.  Shiny.  We like our silver serving trays to catch the attention of the ladies at our tea party.  We want the silver chain around our neck to scream "Look at me!". 

I recently started designing jewelry, hand making pieces in my spare time.  I MORE recently started getting into vintage jewelry design...something you just can't get away with using shiny silver.  Darn!  What's a girl to do with all these shiny silver jewelry pieces?? 
Don't get me wrong...
Shiny silver = love! Vintage silver = LOVE! 
See the difference?  ;) 

That's when I read about oxidation and how certain chemicals can make silver pieces look old.  PERFECT!  But how do I do it?  So, I looked into it...chemicals, store bought chemicals.  :( Requiring rubber gloves and safety goggles to use.  Well, I have two toddlers, so chemicals and their fumes just do NOT mix well with my thoughts of baby safety.  (Yeah, I know...the babies wouldn't be playing with the chemicals. But, I don't know how strong the smell can be!  I'd rather just not chance it.) 

Okay, so let's just cut to the chase.  I read where you could make your silver turn "antique" by using a HARD BOILED EGG.  All natural.  No chemicals, therefore SAFE!  So, I did it!  Here's how:

Here's what you need:
A hard boiled egg (you only use the yolk!)
zip lock bag
silver to turn "antique"
 
Put your egg yolk in the bag.  :)  Crush it up!
 
Put your silver in with the crushed yolk.
Tip: It is recommended to only use sterling silver .925 or LESS.  .999 Sterling silver is hard to turn, apparently.  My little chain is just a cheaper silver chain from a craft store...nothing fancy!
 
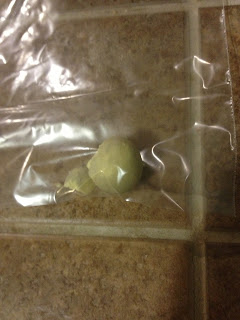
I squished mine all down into the corner to make sure it was all coated.  I later found out this isn't necessarily needed.  It's the sulfur (or sulphur) in the yolk that oxidizes silver, and many say just the gas alone (no need to touch the actual silver) will turn the silver *in time*.
 
I put mine in at 8pm, and at 10pm I decided to check on it.  You can already see it's not as shiny as it was!  I decided to put it back in, over night.
 
Just a picture of the clasp on my necklace...you can see it turning.  This is after 2 hours.


Final results, from leaving these in the bag over night (total of 12 hours).  I love it!  Simply wash it with mild soap and use a small brush (jewelry cleaning brush worked great) to get all of the yolk out of the nooks.
 
You can see the coloring is uneven on the finished result.  I happen to love this!  Goes perfect with what I want to create!  If you don't like the multi-colored look, they recommend NOT LETTING IT SIT ON THE YOLK.  Instead, keep the yolk in the bag, but separate from the silver.  I have not tried this, but maybe it will oxidize more evenly. (Not touching the yolk will take much longer...I would think 1-3 days, whereas this showed results in 2 hours!)  You can always buff this up and shine it to how you like it, using polish cloths.
 
Enjoy!!
Check out my jewelry store on etsy!
and on facebook
Follow me on Instagram!
alli_McKenzie
 
:)


Tuesday, May 28, 2013

Quick Summer Ideas

Hey folks!  Here are two quick summer ideas I have for you:

1.  DIY foot scrub
2.  Mint ice cubes


First, the DIY Foot Scrub...so easy! 


What you need:
3 tbs. olive oil (preferably extra virgin, but any will work)
2 tbs. honey (local or organic are more naatural but store bought is fine too!)
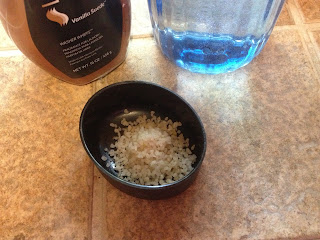
1/2 cup sugar (brown or white...white it shown in this picture)
Tip: pour your oil first, then your honey.  This makes the honey pour from the measuring scoop MUCH easier!

Mix ingredients in a bowl, then transfer into an airtight container.

I first soaked my feet in a mixture of warm water and vinegar.  The vinegar helps kill fungus between toes and under toenails (yuck!) and also deodorizes your feet as well as softens dead skin.  Then, either scoop some DIY Foot Scrub out with your fingers or use a cute little scoop you can find in craft stores.  Either way, you're going to get it on your fingers...so I just scoop with my fingers!  Massage in small circles on your feet, paying special attention to your heels and toes!  Rinse off, dry and feel the softness!  I like to put gentle, non-scented lotion on afterwards!


My next summer tip is so yummy!  Mint ice cubes.  :)  I grew mint using store bought mint leaves (found in the produce section).  I will do another blog on how to grow mint from store bought mint if anyone is interested in learning that.  Anyway, it made SO MUCH mint, that I needed to find something to do with it.  So, I made ice cubes. 

Pretty simple...get an ice cube tray and fill with water, then pick your mint leaves and drop into your ice tray.  I used 3-4 leaves per cube.  It is PERFECT for summer, because the leaves stay fresh when frozen and ads a great mint flavor to your summer drinks!  Water, lemonade, tea, juice...you name it!  Also, mint is great to cook with, so you can just defrost your ice cube and have fresh mint to cook with as well...however it will be soggy since it's wet.  Enjoy!

Tip: Most herbs you can chop up and freeze into ice cubes in order to save them for cooking.


Friday, April 26, 2013

DIY Fabric freshener? Yes, please! With Scentsy!

In our world today, we have Pinterest to thank for the *many* DIY projects that we can dive headfirst into.  They make us feel like better women...right??  Who needs the store bought stuff when you can pioneer your way and make your own.  I admit, everything I see I think, "Man, I can do that..." and then I do it.  Half of the time it works, half of the time it fails.  (Face it, things just don't turn out like the pictures show they do!)

Well, I am all about DIY laundry detergent.  It's been a recent craze on Pinterest and Facebook.  I even blogged about making it and using Scentsy Washer Whiffs...because Washer Whiffs make things waaaayyyy better.  ;)

So when I saw a post recently about DIY fabric freshener (Febreze), I thought "WOW, I can do that...with Scentsy!"  So here you have it....a simple DIY fabric softener using Scentsy's Washer Whiffs. 


What you need:
A water squirt bottle
Water
Baking Soda
Scentsy Washer Whiffs
 
My bottle is 18 ozs, so this recipe is for that size bottle but these ingredients are so harmless, you can add more or less to your liking and there should be no harm done.  :)
 
1.  Fill up your bottle with HOT water.
2.  Put between 1-2 tablespoons of baking soda in (I used a rolled up paper towel as a "funnel")
 
3.  Add Scentsy Washer Whiffs - I used approx. half a cap full (I wanted more scent so I added more than my pic shows)
 
4.  Close your bottle and SHAKE it!
 
(above pic shows before I shook it, while the washer whiffs were still disolving)
 
The mix will STAY CLOUDY, and I did notice when it sits for a while you need to shake it back up before spraying again.  ;)
 
There you have it!!  Let me tell you, I sprayed every fabric in my house to "test" and make sure there were no weird stains.  Shower curtain, mattresses, sheets, dining room chair seats, dog bed and EVEN my microfiber couch.  The entire house smelled amazing and the whole 18 ozs was gone the same day. (Only because I went crazy and literally sprayed the whole house!)
 
Enjoy!!
 
Need some Washer Whiffs?  Check out my website!
Click on BUY, then Layers by Scentsy
:)
 

Wednesday, April 10, 2013

Mother's Day SCENTSY

Hi all!  <3  Just a quick update on the world of Scentsy!  We have some new and exciting products to LOVE.  My personal new FAVE is the Suncare SPF 15 Lotion in Havana Cabana scent!!  Yum!!  I guarantee I'll be the best smelling person on the beach this summer, unless of course, you order it too!  ;)

Well, I wanted to make this about Mother's Day because Scentsy has just launched a Mother's Day Gift Bundle, available starting today (April 10) through May 10.  MOTHER'S DAY IS MAY 12th!!  Are YOU ready??


I know, this pic is hard to see.  :(  The bundle includes:
 
Mother's Day Scentsy Warmer
Sincerely Scent Mother's Day Card
Baked Apple Pie Scentsy Bar
Garden of Love Scentsy Bar
Just Breathe Scentsy Bar
White Gift Box
Scentsy Gift Ribbon
Total Retail Value: $60
 
Scentsy Bundle Price: $45
 
I know right?!?  Great deal!
 
 
Here is a better pic of the Mother's Day warmer!

Sunday, February 3, 2013

Cream Cheese Chicken Poppers

It's Super Bowl Sunday!! 
(Confession, we don't watch football, and hubby is gone to work, ha!)
I have been seeing recipes all over for Super Bowl food...appetizers and chips/dips that people are dying over. Well I have one of my own, that I created today for lunch.  And it is AMAZING!! 
I call it
"Cream Cheese Chicken Poppers"
I have two toddlers, ages 3 and 1...and they both devoured these!
A few nights ago, someone recommended to me that I try a crockpot meal.  All it consisted of was cooked chicken breasts, a jar of salsa and a block of cream cheese. 
SO....this was made from the left overs of that.
**To make the crockpot meal, I diced 1 pound of chicken breast and simply cooked them in a pan with butter and seasoned salt.  Once it is browned, dump it in your crockpot.  Add a block of cream cheese, and a jar of salsa.  I bought a large jar (24 ounces) and used a little more than half.  Cook that on low for 4-6 hours.**
When I did this, it turned out a little too thick.  It did have a great flavor though!
But we had leftovers, so I stuck them in a container in my fridge until I could think of what else to do with it!
So here is my Cream Cheese Chicken Popper recipe:
Ingredients:
1 lb chicken breast
1 8 oz block of cream cheese
1 jar salsa
egg roll wrappers
*Here, you can cook the chicken in your crockpot, like my instructions above in blue, OR cook the chicken in a pan with butter and seasoned salt. Drain (if there is anything in there to drain), add your cream cheese and salsa and cook until bubbly*
CHILL YOUR CHICKEN MIXTURE! <--- This is important for consistency.
You want it to chill until thick...the cream cheese will try to resolidify.  I would say chill overnight, or at least a couple of hours. 
Once it is chilled, scoop the mixture into a food processor, blender, chopper...whatever you have.  The smoother the better, but a few chunks of chicken won't make a difference.
Next, take your eggroll wrappers and fold/cut them in half.  Eggroll wrappers are a pasta, so they should fold in half and tear very easily.
Spoon a dollop of the chilled chicken mixture onto your eggroll wrapper.
(The one on the left was perfect...on the right was a tad too much.)

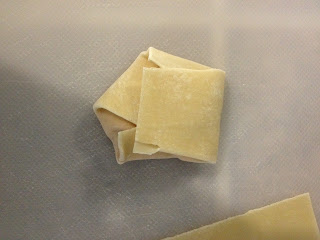
Next, fold in your corners.


Fold your sides over...


 Finish by folding down the top.


Here they are on a cookie sheet (I know, I need to get after this one and clean it!  Another blog post, because I do know HOW to get all the brown gunk off!)

A few options here... brush the tops with olive oil, cooking spray or egg whites.
I used cooking spray on these since it was my first time...and that was the fastest and least expensive if these were a BUST.


Bake at 350 degrees for about 10 minutes, or until they start to brown.


Yum!!  My toddlers loved them.  We ate them plain but they would be good dipped in sour cream or salsa.

I think next time I might add BACON or CHIVES!

This recipe will make PLENTY for a party.  I had some left over (STILL), so I decided to freeze the chicken mixture to use another time!

P.S.  Eggroll wrappers freeze very well too!!!


Let me know what you think!

Happy Super Bowl Sunday!

BTW, I wonder who is winning???  :-/


Friday, February 1, 2013

Secret Ingredient in Southern French Toast!!


French toast is one of my favorite comfort foods...if it is cooked correctly!  I have tried different recipes...but I always go back to my own, simple way of making it!

My secret ingredient isn't really a "secret", because it's found in recipes for french toast everywhere! BUT, it is with THIS ingredient that it tastes the best, and reminds me of good, down-home country cookin'! 

SO - Here it is!  My favorite "secret" ingredient in French Toast!
Vanilla :)


So...what do I do?  ....

1.  I get out 4 pieces of white bread
2.  3 eggs.
3. Whisk eggs in a bowl, add salt AND pepper (many recipes omit pepper!) to taste
4.  Add 1/2 tsp of vanilla to your egg mix, or more depending on your taste
5.  Heat PLENTY of butter in a pan (at least 2 tablespoons to start with...you'll add more later)
6.  Dunk your white bread in the egg mix - both sides - but do not let it SOAK, do it just enough to get the whole piece of bread coated
7.  Gently place in down in your heated pan of butter (My pan holds 2 pieces at a time)


8.  Let it sizzle until slightly brown (resist the urge to press down on the bread!) then flip!  Do the same on that side and take them out. :) 
9.  Add another 2 tablespoons of butter and do the other 2 pieces of bread


Taa-daa!!!  Perfect french toast!  The key is the VANILLA (for taste!), pepper (for even more taste, but omit it if you'd like), not letting the bread SOAK (yuck) and PLENTY of butter to help it get brown and slightly crisp on the outside.


Serve with syrup, honey, powdered sugar, fruit, etc!


Wednesday, January 30, 2013

We are the CHAMPIONS!!

Hi all!  It has been a while since I blogged!  Last time I left you with some cute Scentsy samples.  If you are a consultant, they are worth checking out!! 

But I am *back*. I keep telling myself I will blog more, and facebook less.  :-/ That's not working out too well but I'll try!


So, I may have said this before.  But working with Scentsy has been amazing, because they are an amazing company.  Just look what they are doing NOW! 

Each catalog season, Scentsy has a charitable warmer where proceeds go to help a special organization. This Fall/Winter, "Champion" has been our charitable warmer where proceeds benefit the Special Olympics.


Scentsy has announced that for every "Champion" warmer purchased, another Champion warmer will be sent to an athlete of the Special Olympics (the Special Olympics started yesterday, 1/29/13!) They are doing this until EVERY athlete has a warmer!  Additionally, the proceeds raised will STILL go towards supporting the Special Olympics International organization!


That, HANDS DOWN, proves that Scentsy is THE company to work for!  (Really, I don't even like saying I work FOR Scentsy, because in my opinion, I work WITH Scentsy.)
 
Help us all spread the word so that EVERY athlete of the Special Olympics has a CHAMPION warmer from Scentsy!!  (Blog, Pin, share on FB, etc!)
 
 
You may visit my website, at www.allisonmckenzie.scentsy.us to purchase YOUR Champion warmer.  While there, have a look at Hosting Parties, or gain information about Joining my TEAM and becoming part of this amazing company!