Friday, April 26, 2013

DIY Fabric freshener? Yes, please! With Scentsy!

In our world today, we have Pinterest to thank for the *many* DIY projects that we can dive headfirst into.  They make us feel like better women...right??  Who needs the store bought stuff when you can pioneer your way and make your own.  I admit, everything I see I think, "Man, I can do that..." and then I do it.  Half of the time it works, half of the time it fails.  (Face it, things just don't turn out like the pictures show they do!)

Well, I am all about DIY laundry detergent.  It's been a recent craze on Pinterest and Facebook.  I even blogged about making it and using Scentsy Washer Whiffs...because Washer Whiffs make things waaaayyyy better.  ;)

So when I saw a post recently about DIY fabric freshener (Febreze), I thought "WOW, I can do that...with Scentsy!"  So here you have it....a simple DIY fabric softener using Scentsy's Washer Whiffs. 


What you need:
A water squirt bottle
Water
Baking Soda
Scentsy Washer Whiffs
 
My bottle is 18 ozs, so this recipe is for that size bottle but these ingredients are so harmless, you can add more or less to your liking and there should be no harm done.  :)
 
1.  Fill up your bottle with HOT water.
2.  Put between 1-2 tablespoons of baking soda in (I used a rolled up paper towel as a "funnel")
 
3.  Add Scentsy Washer Whiffs - I used approx. half a cap full (I wanted more scent so I added more than my pic shows)
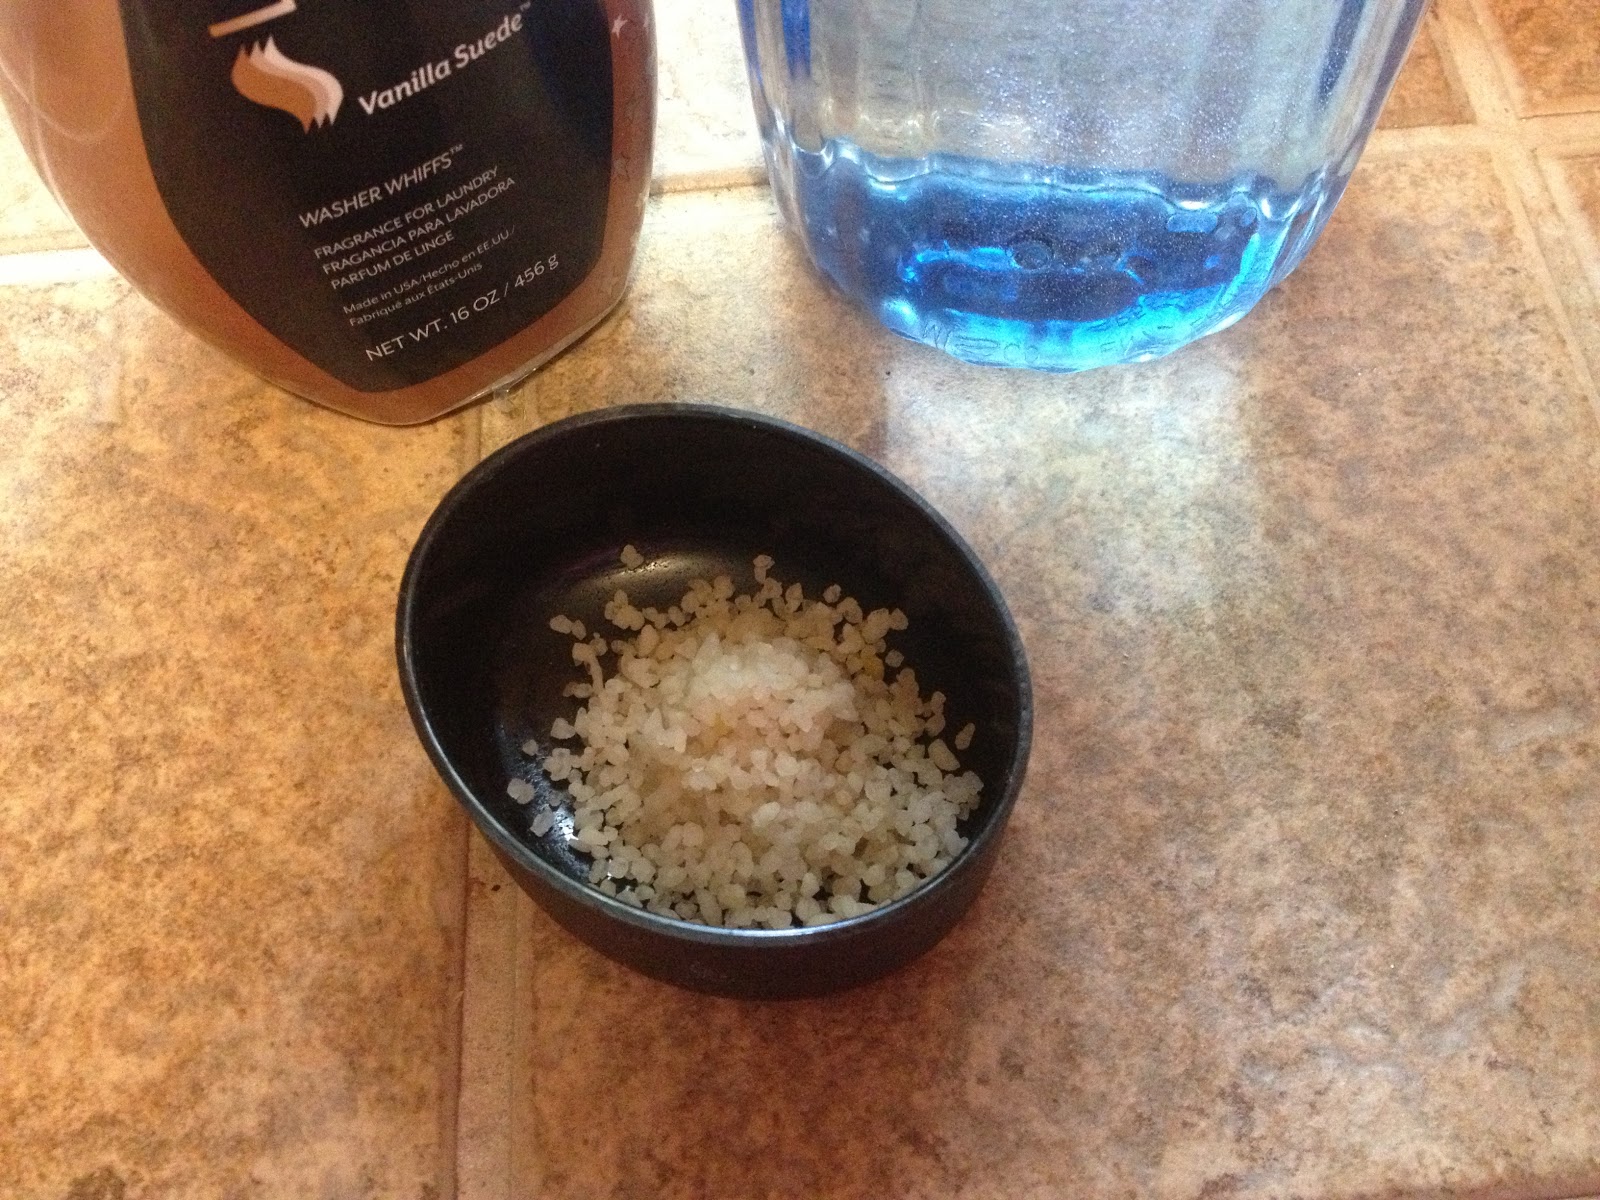
 
4.  Close your bottle and SHAKE it!
 
(above pic shows before I shook it, while the washer whiffs were still disolving)
 
The mix will STAY CLOUDY, and I did notice when it sits for a while you need to shake it back up before spraying again.  ;)
 
There you have it!!  Let me tell you, I sprayed every fabric in my house to "test" and make sure there were no weird stains.  Shower curtain, mattresses, sheets, dining room chair seats, dog bed and EVEN my microfiber couch.  The entire house smelled amazing and the whole 18 ozs was gone the same day. (Only because I went crazy and literally sprayed the whole house!)
 
Enjoy!!
 
Need some Washer Whiffs?  Check out my website!
Click on BUY, then Layers by Scentsy
:)
 

Wednesday, April 10, 2013

Mother's Day SCENTSY

Hi all!  <3  Just a quick update on the world of Scentsy!  We have some new and exciting products to LOVE.  My personal new FAVE is the Suncare SPF 15 Lotion in Havana Cabana scent!!  Yum!!  I guarantee I'll be the best smelling person on the beach this summer, unless of course, you order it too!  ;)

Well, I wanted to make this about Mother's Day because Scentsy has just launched a Mother's Day Gift Bundle, available starting today (April 10) through May 10.  MOTHER'S DAY IS MAY 12th!!  Are YOU ready??


I know, this pic is hard to see.  :(  The bundle includes:
 
Mother's Day Scentsy Warmer
Sincerely Scent Mother's Day Card
Baked Apple Pie Scentsy Bar
Garden of Love Scentsy Bar
Just Breathe Scentsy Bar
White Gift Box
Scentsy Gift Ribbon
Total Retail Value: $60
 
Scentsy Bundle Price: $45
 
I know right?!?  Great deal!
 
 
Here is a better pic of the Mother's Day warmer!

Sunday, February 3, 2013

Cream Cheese Chicken Poppers

It's Super Bowl Sunday!! 
(Confession, we don't watch football, and hubby is gone to work, ha!)
I have been seeing recipes all over for Super Bowl food...appetizers and chips/dips that people are dying over. Well I have one of my own, that I created today for lunch.  And it is AMAZING!! 
I call it
"Cream Cheese Chicken Poppers"
I have two toddlers, ages 3 and 1...and they both devoured these!
A few nights ago, someone recommended to me that I try a crockpot meal.  All it consisted of was cooked chicken breasts, a jar of salsa and a block of cream cheese. 
SO....this was made from the left overs of that.
**To make the crockpot meal, I diced 1 pound of chicken breast and simply cooked them in a pan with butter and seasoned salt.  Once it is browned, dump it in your crockpot.  Add a block of cream cheese, and a jar of salsa.  I bought a large jar (24 ounces) and used a little more than half.  Cook that on low for 4-6 hours.**
When I did this, it turned out a little too thick.  It did have a great flavor though!
But we had leftovers, so I stuck them in a container in my fridge until I could think of what else to do with it!
So here is my Cream Cheese Chicken Popper recipe:
Ingredients:
1 lb chicken breast
1 8 oz block of cream cheese
1 jar salsa
egg roll wrappers
*Here, you can cook the chicken in your crockpot, like my instructions above in blue, OR cook the chicken in a pan with butter and seasoned salt. Drain (if there is anything in there to drain), add your cream cheese and salsa and cook until bubbly*
CHILL YOUR CHICKEN MIXTURE! <--- This is important for consistency.
You want it to chill until thick...the cream cheese will try to resolidify.  I would say chill overnight, or at least a couple of hours. 
Once it is chilled, scoop the mixture into a food processor, blender, chopper...whatever you have.  The smoother the better, but a few chunks of chicken won't make a difference.
Next, take your eggroll wrappers and fold/cut them in half.  Eggroll wrappers are a pasta, so they should fold in half and tear very easily.
Spoon a dollop of the chilled chicken mixture onto your eggroll wrapper.
(The one on the left was perfect...on the right was a tad too much.)

Next, fold in your corners.


Fold your sides over...


 Finish by folding down the top.


Here they are on a cookie sheet (I know, I need to get after this one and clean it!  Another blog post, because I do know HOW to get all the brown gunk off!)

A few options here... brush the tops with olive oil, cooking spray or egg whites.
I used cooking spray on these since it was my first time...and that was the fastest and least expensive if these were a BUST.


Bake at 350 degrees for about 10 minutes, or until they start to brown.


Yum!!  My toddlers loved them.  We ate them plain but they would be good dipped in sour cream or salsa.

I think next time I might add BACON or CHIVES!

This recipe will make PLENTY for a party.  I had some left over (STILL), so I decided to freeze the chicken mixture to use another time!

P.S.  Eggroll wrappers freeze very well too!!!


Let me know what you think!

Happy Super Bowl Sunday!

BTW, I wonder who is winning???  :-/


Friday, February 1, 2013

Secret Ingredient in Southern French Toast!!


French toast is one of my favorite comfort foods...if it is cooked correctly!  I have tried different recipes...but I always go back to my own, simple way of making it!

My secret ingredient isn't really a "secret", because it's found in recipes for french toast everywhere! BUT, it is with THIS ingredient that it tastes the best, and reminds me of good, down-home country cookin'! 

SO - Here it is!  My favorite "secret" ingredient in French Toast!
Vanilla :)


So...what do I do?  ....

1.  I get out 4 pieces of white bread
2.  3 eggs.
3. Whisk eggs in a bowl, add salt AND pepper (many recipes omit pepper!) to taste
4.  Add 1/2 tsp of vanilla to your egg mix, or more depending on your taste
5.  Heat PLENTY of butter in a pan (at least 2 tablespoons to start with...you'll add more later)
6.  Dunk your white bread in the egg mix - both sides - but do not let it SOAK, do it just enough to get the whole piece of bread coated
7.  Gently place in down in your heated pan of butter (My pan holds 2 pieces at a time)


8.  Let it sizzle until slightly brown (resist the urge to press down on the bread!) then flip!  Do the same on that side and take them out. :) 
9.  Add another 2 tablespoons of butter and do the other 2 pieces of bread


Taa-daa!!!  Perfect french toast!  The key is the VANILLA (for taste!), pepper (for even more taste, but omit it if you'd like), not letting the bread SOAK (yuck) and PLENTY of butter to help it get brown and slightly crisp on the outside.


Serve with syrup, honey, powdered sugar, fruit, etc!


Wednesday, January 30, 2013

We are the CHAMPIONS!!

Hi all!  It has been a while since I blogged!  Last time I left you with some cute Scentsy samples.  If you are a consultant, they are worth checking out!! 

But I am *back*. I keep telling myself I will blog more, and facebook less.  :-/ That's not working out too well but I'll try!


So, I may have said this before.  But working with Scentsy has been amazing, because they are an amazing company.  Just look what they are doing NOW! 

Each catalog season, Scentsy has a charitable warmer where proceeds go to help a special organization. This Fall/Winter, "Champion" has been our charitable warmer where proceeds benefit the Special Olympics.


Scentsy has announced that for every "Champion" warmer purchased, another Champion warmer will be sent to an athlete of the Special Olympics (the Special Olympics started yesterday, 1/29/13!) They are doing this until EVERY athlete has a warmer!  Additionally, the proceeds raised will STILL go towards supporting the Special Olympics International organization!


That, HANDS DOWN, proves that Scentsy is THE company to work for!  (Really, I don't even like saying I work FOR Scentsy, because in my opinion, I work WITH Scentsy.)
 
Help us all spread the word so that EVERY athlete of the Special Olympics has a CHAMPION warmer from Scentsy!!  (Blog, Pin, share on FB, etc!)
 
 
You may visit my website, at www.allisonmckenzie.scentsy.us to purchase YOUR Champion warmer.  While there, have a look at Hosting Parties, or gain information about Joining my TEAM and becoming part of this amazing company!


Thursday, October 4, 2012

Fun - Unexpected - Scentsy samples!

Okay, so it has been a while since I have posted anything.  I'm apparently not one who can keep a blog running every day.  I like to just jump on here and share my ideas when I have great ones to share!  And here's a great idea...especially if you are a fellow Scentsy consultant

The Fall/Winter months are upon us, and I dove right in and got my Scentsy facebook fans ACTIVE and wanting to smell our new scents!  (Find my FB page here: www.facebook.com/findscentshere.scentsy

So...after announcing the NEW scents for the season, I started a poll asking which scent they'd MOST like to smell.  These weren't necessarily the new scents for the season, just 5-6 that I thought should be voted on.  ;)  This was fun!  It got people to interact with both my facebook page as well as my website as they looked around at the scents.  I offered to send a scent sample to each person who voted and who messaged me with their addresses.  I had something special in mind!!

AUTUMN SUNSET won the poll, and a close second was Iced Pine.  :) 

After I knew the winning scent, I ordered the mini testers for that scent (these are only available for Scentsy consultants...sorry guys!).  Inspired by this blog post (http://wishhopedream.net/2012/02/21/mini-tester-magnets/), I purchased small ROUND magnets from my local craft store.  (They were near the jewelry making items!)

THEN, at my local Dollar General, I found some fabulous (and cheap!) "Garland Christmas Card Holder".  It was just a random item down their Christmas aisle!  (And this is the beginning of October so I got to their stuff EARLY in the season.  Sorry if you can't find any!)  The garland came in either Christmas Trees, Gingerbread Man or Candy Canes....I chose Gingerbread men because I wanted it to be more FALL than Christmas since AUTUMN SUNSET won my poll.  :)  But...Gingerbread men seem like Christmas to me too......Still, these came out SUPER CUTE!

The "garland" was on twine, and used miniature clothes pins and felt gingerbread men.  (Easy to make if you can't find any...purchase twine from your craft store.  Also look in the scrapbooking section for anything you can adhere to a miniature clothes pin.  There are TONS to choose from in scrapbooking sections.)

Next, I googled "Free fall gift tags" and found some free little tags to print out.  :)  (Here are the ones I used:  http://www.printables4mom.com/2012/09/14/printable-fall-cupcake-toppers-and-gift-tags/)  Easy. I printed the same amount of tags as I had ordered in the mini testers.  Then, cut them out! I then turned all my fall gift tags over on wax paper, and SPRAYED them with the runner up scent (using Room Spray)....Iced Pine. :) I let that dry 30mins-1 hr and then wrote on them "Smell Me! Iced Pine". I decided to do this because Iced Pine is one of my favs, and I wanted a way for them to smell the runner up scent as well! Again, easy!

After that, I typed up a little hostess special. (You don't have to use a special...use anything to book a party that you LOVE using!  Scentsy offers GREAT deals to their hostesses as it is!  Just type it up, make it small and BRIEF.) These are to be placed in the mini clothes pin from the garland. (NOTE:  It is AGAINST Scentsy policy to publicly post your specials!  I will NOT reveal what my special is on this blog, and in the pictures it should be covered up.  Y'all PLEASE respect Scentsy's policy and procedure if you do this activity!  DO NOT POST TO WHERE YOUR SPECIALS ARE VISABLE!) 


NEXT, I put it all together!
1.  Hot glue the round magnets to the back of the mini tester
2.  Cut up your garland, leaving yourself enough room to tie around mini tester
3.  Use a hole punch for the free fall gift tags (the ones you sprayed with room spray!)
4.  String the fall gift tags onto the garland, then clip a Hostess special in with the miniature clothes pin.
5.  Take the top off the mini tester (go ahead...sniff it, AGAIN, lol) - then using the excess from the twine of the garland, tie it around the tester where the top goes!
6.  Screw on the top, squishing down the twine.
7.  Taa-daa!  So cute and FUN scent samples to keep your customers intrigued! 

Pictured below shows the back of the tester and the back of the fall gift tags that I sprayed with Scentsy's Iced Pine room spray.


Next two, show the CUTE and FABULOUS finished product!!


Mini tester, twine garland (came with mini clothes pin and felt gingerbread man) with enough excess to tie around tester, fall gift tag sprayed with room spray and a Hostess Special clipped in mini clothes pin.
 
If you cannot find the twine garland, use thin ribbon or yarn!  Felt cut outs can be found in both the scrapbooking section and art/crafts section of your craft store. 
Mini clothes pins can be found at Wal-Mart!
 
My contact info is on the BACK of the little hostess special card.  Be sure you remember to add this, so they can contact you! 
 
 
Enjoy!!!
 
View my website here:  www.allisonmckenzie.scentsy.us to view products, sign up to Host a party or Join my Scentsy team!
 

Saturday, July 7, 2012

Top 10 Favorite Uses for Baby Powder!!

If you follow my blog, you should know by now that I have 2 baby girls.  :)  Well, I never really used baby powder until my first baby girl came along, and since then I have found many personal favorite uses for it!  Some of them I've read and "collected" over a few years time and others I have tried and tested just to see how it works out for me.  I've decided to share some of my favorite uses!


1.  Rub beach sand off - We are a beach family!  We go every year...but nothing is worse than sticky sand all over your hands, feet and booty!  I always pack a travel size baby powder bottle, so that when we are ready for our snacks on the beach, I simply sprinkle the powder on and the sand rubs RIGHT OFF.  It's pretty much, MAGIC!  ;) 

2.  Get rid of pesky ants in the house - Did you know, ants hate baby powder?  For some reason, it's true!  And the good news, is that it is safe to use around kiddos, instead of harsh ant spray.  Sometimes those little "sugar ants" find their way into our kitchen window to our sink.  Sprinkle baby powder on their trail....and they are gone! 


3.  Decrease grease in your hair - simple "dry shampoo"!  I recommend putting it in the palm of your hands, and then finger combing through your hair, instead of dumping the bottle of baby powder upside down on your head!  They always say washing your hair every day is not good...now, you don't have to!


4.  Grease splatters (on counters and clothing) - one of my least favorite things to cook, but favorite thing to eat...BACON.  It splatters everywhere!  Counters, stove and clothing.  And the grease stinks!  So...I grab my bottle of baby powder and sprinkle it on the counters...wipes right up!  Also, for grease splatters on clothing, sprinkle it on, rub it in and repeat until you don't see the grease spot anymore.  (This does NOT take the place of washing your clothing after getting grease on you!  This method "soaks" up the grease until you can get it in the washer!!) 

5.  Freshen mattresses between changing sheets - Next time you change our your bedding, sprinkle baby powder on your mattress!  Soaks up odors, freshens the mattress and will actually make your fitted sheet feel cooler when you get in your bed!


6.  Squeaky floor boards - This one sounds weird, and I wasn't so sure when I first read it on the internet, but it works!  Squeaky floors?  Sprinkle baby powder down and sweep or brush into the cracks of the area it is squeaking.  Taa-daa!  No more squeaks!  Weird, huh??


7.  Setting make-up -  Baby powder makes your skin super soft!  I am not one to wear a lot of make-up...actually, most days I wear none at all.  But, when I do, I wear foundation, blush, mascara (see tip #10!!) and baby powder!  ;)  Lightly sprinkle baby powder into the palms of your hands and rub together, then rub over your foundation and blush.  This acts as a setter for your make-up!  Also, absorbs any grease during the day!

8.  Heat rashes/diaper rashes -  This is the obvious use for baby powder!  I learned the hard way, that every diaper change should be finished off with a sprinkle of baby powder!  If your little one already has a rash...go for Pure Cornstarch baby powder!  Clears it up in just a few uses.  I use the Pure Cornstarch to PREVENT a diaper rash as well.  (My youngest daughter is 6 months old and has never had a diaper rash!)

9.  Socks/shoes/gym bags - Maybe another obvious use.  Sprinkle some in your shoes and socks for a quick refresher.  Also great in the bottom of gym and diaper bags!  Helps keep odor at bay!  AND, sprinkle some in your slippers, so when you get out of the shower and slip into slippers, the powder helps soothe and smooth your feet!

10.  Thicker lashes - YES!  Most women long for those "movie star" lashes, but don't want to deal with false lashes!  I read this one online and thought to myself "NO WAY...".  But YES, it works!  You need an extra lash brush for this "trick", so be prepared!  Apply your mascara, then sprinkle some powder in your hand...run a lash brush through it and apply to your still damp lashes.  Allow to dry, then repeat a layer of mascara.  Continue this until you have reached your desired thickness. 


So there you have it!  My favorite uses for Baby Powder!!!!


<script async src="//pagead2.googlesyndication.com/pagead/js/adsbygoogle.js"></script>
<!-- Top 10 Baby Powder Uses -->
<ins class="adsbygoogle"
     style="display:block"
     data-ad-client="ca-pub-3156539632625789"
     data-ad-slot="8544491759"
     data-ad-format="auto"></ins>
<script>
(adsbygoogle = window.adsbygoogle || []).push({});
</script>