Sunday, December 4, 2016

DIY Wood Snowman Family

It's Christmastime!  I love to get in the spirit with a new project! 

Here is my DIY Wood Snowman Family


I had my husband cut a 2x4 to the appropriate sizes for a daddy, mommy, and three little girl snowmen.  (If you don't have a handy hubby with a wood saw, be sure to ask your local home improvement store if they will cut it for you! Most do!)

The wooden slab as the base is actually from Hobby Lobby!  
I used a 40% off coupon on it and got it for $8. 

Next, everything gets two coats of white paint.  

I played around with faces on paper before I painted them on.
Hint: Pinterest has some cute ideas!
I let my older two girls pick out the faces they wanted.
Notice the female snowmen have eyelashes.  :)

And I added pink cheeks to the girls.


I used hot glue to add details.


(Ignore the construction in my KITCHEN.  We are remodeling. Woohoo.)


I used a black sharpie to write our family name.  The snowmen are attached with standard wood glue.  (Tip: after glue is dry, go back with white paint and "seal" the base of the snowmen to cover that yellowish glue color.)


The possibilities are endless with this one since all our families are different!  There are so many different details that can be added to make this your own.  <3

Merry Christmas!


Thursday, July 7, 2016

Pediasure Ice Cream

Hi y'all...I'm excited to share with you, a delicious, healthy treat I made for my kids. 

Pediasure Ice Cream!  

Every time we went shopping at Wal-Mart, my 6 year old would beg me for Pediasure.  They had never tried it before, but the flavors and cute little giraffe on the bottle appealed to them, enough for her to beg me for weeks to buy some.  I finally gave in...and what do you know...they hated them.  Of course.

Pediasure is expensive (to my family, anyway)!  They sat in my fridge for a few days; a sad waste of money that would be poured down the drain if I opened one for them to try again.

I finally remembered the easy recipe for "ice cream in a bag".  The ingredients needed: milk, sugar, vanilla, salt, ice and ziplock bags. 

So I tried the recipe with Pediasure instead of milk.  

They ate EVERY BITE.  They never once mentioned that their new ice cream treat tasted yucky like they had told me just an hour before at the dinner table.


I used one can of pediasure in place of the milk.  One can of Pediasure is a little bit more than a cup.  All the recipes I saw called for a cup of milk....and the little bit extra didn't seem to bother the recipe at all.

- One can Pediasure 
(I used one chocolate can, then did again with one strawberry)
- 2 tbsp sugar
- 1/2 tsp vanilla
- 2-3 cups ice
-1/4 cup salt 
(most recipes call for rock salt. I used table salt and this still worked for me!)

In a quart size ziplock bag, pour your sugar and vanilla, then add your can of Pediasure.
Shake!
Put your 2-3 cups of ice in a gallon size zip lock bag.
Add your pediasure/sugar bag to the gallon bag.
SHAKE!
Shake for 5 minutes.
(Wear pot holders or mittens.  It gets COLD!)

You'll start to notice the ice cream hardening.
(I had two quart size bags of Pediasure mixture. One chocolate, one strawberry.)

Let the Pediasure/ice cream mixture sit in the ice for another 5 minutes.

Open bags and scoop out ice cream into bowl.  I noticed my strawberry was much softer than the chocolate, because I had put it in the bag a few minutes after I started the chocolate one.  So I set our bowl of ice cream in the freezer for 30 minutes.  It could have stayed in the freezer for an hour and been just fine, also.


Both were soft serve, ready to be devoured by the kids!


Mom WIN!!  ;-)

P.S. We had some extra left over, so I covered the leftovers and froze overnight.  This did NOT work.  It was rock hard, like ice.  I couldn't get it to melt to the right "ice cream "consistency.  So plan on this being a one time snack.  If you figure out a way to save any left overs, please comment and let me know!


Monday, June 13, 2016

DIY "Patchwork" Picture Frame

Hey y'all!  This is a fun, creative DIY project that you can make to match any decor! 


Materials needed: 
*Unfinished wooden frame (local craft store like Michael's or Hobby Lobby)
*scrapbook paper
*Mod Podge
*Acrylic paint 
*foam paint brush


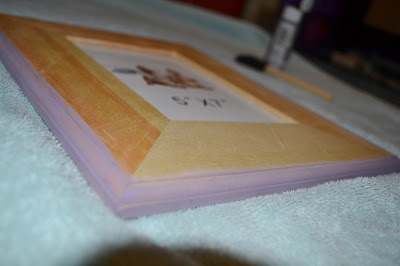
First, you need to paint the edges of your unfinished wood picture frame.  Allow that to dry.


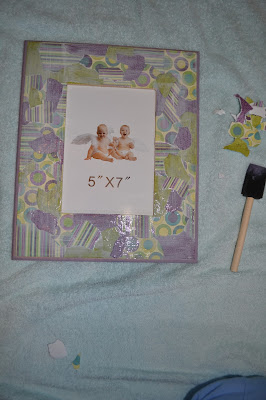
Next, choose 4 corners of your scrapbook paper.  These will be the 4 corners of your picture frame.  Tear them into bigger pieces, leaving the corners in tact so they fit into the corners of your frame.


Use Mod Podge UNDER and on top of the scraps.


Continue tearing your scrapbook paper using the straight edges to line up on the edges of the frame.  Again, mod podge under and on top of your paper.


Continue using the edges of  your paper to complete the edges of the frame.


Use the rest of your scrapbook paper to layer, and fill in the remaining blank spots on your frame.  There is NO wrong way to do it!


Layering paper (below)


After you have all your blank spaces filled up, add another full coat of mod podge over the entirety of the project.  This ensures no corners are sticking up, which could result in curling of your scrapbook paper.   


After it dries, add any embellishments you would like!  Here, I used handmade rolled rosettes, and a few stick on pearls for the corners.


Others I completed:

 Tip:  Try using a variety of textured paper, scrapbook embellishments and colors to match your decor!  These make excellent handmade gifts!  Try personalizing with a families last name or child's name for their bedroom.  :)  Add ribbon to hang, attach wire picture hangers on the back, or use the wooden pegs that should come with your unfinished frame to use these as table top frames.


Hope you all enjoy this project as much as I did! 
Happy crafting!  :)


Tuesday, June 7, 2016

Raindrops Full of Blessings!

Hey y'all...

This will be a short post, but hopefully full of power for those who read.  On the radio, I heard a quote...

"If blessings were raindrops, how wet would you be?"


Honestly, we'd probably all be soaked to the bone.  How great is our God!  

This quote (above) is derived from Isaiah 45:8...
 You heavens above, rain down my righteousness;
    let the clouds shower it down.

Let the earth open wide,
    let salvation spring up,
let righteousness flourish with it;
    I, the Lord, have created it.


If you haven't already heard Laura Story's song, Blessings - here is a link.  Check her out!
https://www.youtube.com/watch?v=JKPeoPiK9XE&list=PL-Setdg6GIKS5gab8soa5_MNJ9AoKE568


I have spent a few days thinking about this quote and the verse and how it relates to the blessings that are POURED onto us as God's people.  


Thank you Lord, for all of your many blessings.  We are so undeserving, yet you shower us with your righteousness anyway.

Amen


Wednesday, June 1, 2016

Kid-Approved 4 Ingredient Cookies!


Okay...so we are admittedly not a "healthy eating" family.  We do eat plenty of fresh fruits and vegetables (my children's favorite snacks!), but when it comes to baked or store bought snack foods, we go straight for the "bad stuff".  You know, like Chips Ahoy, Lays potato chips and dips, movie buttered popcorn...


So when I ran across a 4 ingredient recipe for HEALTHY cookies, of course I was skeptical.  We like the sweet, gooey, messy kind of cookies.  But I happened to have the ingredients on hand so we gave them a try.  AND - my kids and I liked them!!

Ingredients: 
2 ripe bananas
1-1/2 cups instant oats
1/3 cup peanut butter
1/4 chocolate chips

Preheat oven to 350.  Line a baking sheet with parchment paper OR lightly spray baking sheet with cooking spray.


Put ingredients in a bowl.....and mash!  This was fun for the kids.  ;)


It should look something like this.  

Bake for 10-12 minutes.  If they still seem "gooey", bake for another 2-3 minutes.  15 minutes is the maximum time!


They aren't overly sweet.  They are soft and moist.  And they are made with healthier, easy ingredients!  You can feel good about allowing your child to have another cookie.  Enjoy!  :)


Saturday, October 31, 2015

Painting with Skittles!


My 2 year old preschool class loved this project!  It's one I plan to repeat and one I'll have my own children do at home.  So here it is, painting with Skittles! 

Needed:
Skittles (8-12 of each color)
baby food jars or cups, bowls, etc.
clear corn syrup
paintbrush and paper

We had been talking about the 5 Senses this week and boy did this project go right along with that theme!  

Skills used
Math: sorting and counting
Fine Motor: using pincher fingers to sort
Art/Manipulative: freedom to create art at will

5 Senses used: (for Skittles)
Touch - smooth 
Taste - sweet
Sight - colors, round, small
Smell - sweet
Hearing - we listened to them jiggle in the glass jars

First, during circle time I had each child help me sort the Skittles by color into the baby jars.  This is excellent practice for their pincher fingers!  We were able to talk about the colors as we went, as well as counting.  We used 8-10 of the darker colors (red, blue, purple) and 10-12 of the lighter colors (green and orange).  

Next, we listened to the skittles jiggle around in the jars as I swirled them around. They then watched as I poured the corn syrup into each jar.  We talked about it being thick and looking sticky but we didn't touch it yet.  ;)  Set them to the side.  It takes at least overnight for the colors to work!


You can show your class throughout the day that the colors from the skittles are starting to be "pulled" by the corn syrup.  Stir the syrup and skittles then leave them overnight until the next school day.  I simply covered ours with a paper towel and left them.  

The next day we stirred again. We smelled inside each jar.  It smells sweet like each of the Skittle flavors!  Our project wasn't going to be until the end of the day, so we left them on our counter for a few more hours.  The longer they sat, the more vibrant the colors became! 


Here comes the fun part!  Remember, my class is only 2 years old (and a few young 3's)!  They did excellent with this!  

Here is my own daughter (almost 4) enjoying the left over "paints" after my class was over.  


The colors swirled together as they painted.  I'll be excited to come back and blog about the results once their projects are dry.  I'll post a few of theirs in my next blog post!


Saturday, September 19, 2015

Cheap Birthday Candle Makeover!

I had a DIY birthday party -stroke of genius- this year when my little girls turned 5!  (It took me 6 months to find time to blog about it...busy wifey of an oilfield hubby.)

We had a Frozen birthday party for her.  She was so excited, and I had everything perfectly planned out.  Except I forgot to order the perfect cake topper!  So I settled for a generic #5 birthday candle from the dollar store...

Then it hit me!  

Glue + glitter = stroke of genius!


Taa-daa!  There you have it.  The perfect solution to the cheap candles!  Obviously you can customize to your birthday theme colors.  :)  Enjoy!